Or, why don’t I ever learn to leave well enough alone? Why?
Okay, the old girl has been on the road since 2002 and has been over close to 90,000 miles of back roads in the USA and Canada. I recently replaced her leaky Hooker Headers with some really nice Sanderson cast steel headers and wrapped the exhaust head pipes to help take the heat load off of the steering box and starter motor. Come to think of it, I replaced the starter motor with a gear drive version from a newer model Corvette. And, I treated her to a new Edlebrock 500 CFM four barrel and a new Mallory ignition module. And since her shoes were a worn, I gave her a new set of tires!
To top it off, I finally replaced the dash panel which was a ball milled aluminum billet piece which I have hated since day one.
So, mechanically she is in top notch form and since I had some paint left over from when I repainted the hood and front side panels last year, I said why not fix all the paint chips! Why not indeed…
It all started, as usual, rather simply, just handle the paint chips on the front fenders and it would all be just wonderful. The plan was to feather edge the chips and fill them with EasySand filler, block them down and then air brush them to blend into the rest of the paint.
When I pulled the front bumper so I could get to the fenders I noticed how badly pitted it was and also it had a big chip in the chrome where it had separated from the bumper. So I did some checking and found out that Royal Plating wanted $350 to re-plate the bumper plus, shipping an environmental fee of 7 % and then AZ state sales taxes, which brought the total up to just under $400! I had just got a new Drake catalog so I called them up to see about a new re-popped bumper, $315, free shipping and no tax! So I ordered it and 8 new bumper bolts, washers and nuts which were more than a bit spendy, but sure looked better than all the mismatched pieces I had holding both bumpers onto the car.
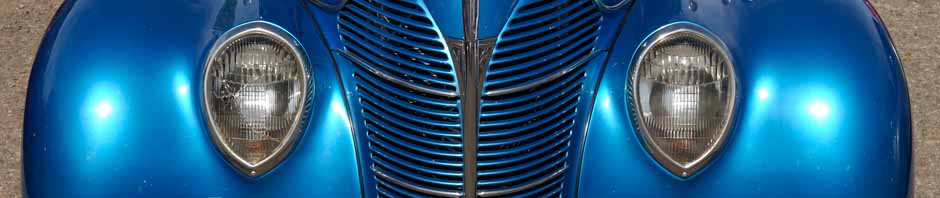
Well, by the time I got all of the chips sanded, I had pretty much had redone most of both fenders. Then I looked at the grill shells and they now looked really ugly, especially the half with the big dent in the lower part where I ran into a parking bumper… so off comes the grills, hammer out the dent, fill the chips, prime them and I am ready to paint… since the size of the job had gotten a lot bigger, the air brush idea quickly was replaced with my Iwata LPH400.
Well, since I had to use the big gun anyway, I thought I might as well take care of all of the chips in the front of the roof, oh, might as well hit the doors too! So, now the job is larger than the amount of base coat/clear coat I had left in stock … sigh… so off to Flagstaff to the PPG dealer to pick up a quart of base and one of clear.
Now, a word about the paint colors. When I bought the car lo these many years ago, I was told that the body, doors, hood, side panels and deck lid were a different shade of Neon blue than the fenders and running boards. I had assumed that the remaining can of paint that the previous owner had given me was for the body, turns out that it what was used on the fenders… sigh.
When I had repainted the hood and side panels last year, I had used the paint that was left over from when I had bent up the driver side running board with my two post lift. Since the hood and side panels were close to the front fenders the paint looked like it matched pretty nicely…
Okay, now we are getting some where, exactly where I am not totally sure but moving forward! I masked off the body behind the doors, the hood and the roof back from the door line with the idea of blending the new paint on the front of the roof with the old paint on the rest of the roof. After spraying out the base coat I finally saw how much darker the new paint was, and how nicely it matched the old paint on the fenders and running boards. There was no way in hell that I could pull off blending the two to three shades darker paint into the original. So I cleared the base that I had just sprayed and let it dry.
Needless to say I wasn’t very happy with the results. 🙁 Sooooo…. out comes the 600 paper and I wet sand the cowl, roof, deck lid, doors and rear quarter panels. Then I get to mask everything else off again and get ready to paint again… bzzzzt need more paint! Another 2 hr trip to Flagstaff and 2 hr trip back and we have enough paint to finish the job. Laid the base down, and again I was very pleased with the way the PPG DBC base coat sprays out, even with a fairly heavy metallic like the 1996 Buick Neon Blue that I am using on Ol’ Blue it is very uniform and consistent. Once I had two coats of base down I spayed three wet coats of PPG Shopline clear coat, turn off the lights and went home for dinner.
After wet sanding with 1000, 1200, 1500, 2000 and 2500 then buffing with 3M Number 1 rubbing compound and a final polish with 3M Number 2 machine polish I called it done. The final result looks okay, not anywhere great because of masking issues but from 10′ away, it looks good enuf for a driver.
If I had realized that the paint mismatch was as strong as it was, I would have done the whole job differently and would not have some of the masking issues that I ended up with. Too Old Too Soon Too Late Too Smart. When I get the 40 done I may go back a reshoot the whole thing, but for now it is what it is.
Got everything put back together and cleaned her up a bit and she is good to go to Silver City. When we get back from that trip I will pull the tranny to replace the front seal in the torque converter which should take care of my constant oil leak.
Now on to pulling the body from the 40 Ford Convertible!
Tis getting busy again in the shop!